

How To Export Folders From Outlook Web App
How To Save Emails From Outlook Web App To Hard Drive: A Complete Guide
Outlook Web App is a personal information manager web application provided by Microsoft. It comprises an interface just like MS Outlook (for desktop) and it comes up with Office suite. It is also called the browser-based app OWA and Exchange Web Connect with the earlier versions of Exchange Server. Read this post to know "How to Save Emails From Outlook Web App to Hard Drive?"
All the users who wanted to access their Microsoft Outlook emails from any computer that is connected to the Internet, use Outlook Web Access. It allows users to access their MS Exchange Server from any web browser like Safari, Internet Explorer, Firefox etc. After all, OWA works wonderfully and is a fantastic email client. It has so many features to control emails, address book, calendars, tasks etc. So, these are the factors that make this solution the industry standard.
Reasons to Save Emails From Outlook Web App to Hard Drive or Desktop
Outlook Web App is highly dependent on the Internet Information Server. Hence, an improper configuration of the IIS server can take users to OWA malfunction. Apart from this, there are thousands of risks being comprised with Outlook Web Access platform. IIS connection errors, authentication problems, login failures etc., are some issues that make users worry about spam and all the sorts of malicious attacks like viruses, which can come through email. Due to all of these common OWA issues and worries, the need to copy emails from Outlook web app to desktop.
How to Save Emails From Outlook Web App to Hard Drive?
Well,copy emails from outlook web app to desktop can be done via two different techniques i.e., manual and automatic. In this section, we are going to introduce users with both methods and it is recommended to follow the instructions sequentially and carefully as any wrong step may lead to permanent data loss save emails from outlook web app to hard drive.
1. Automatic Method to Save Emails From Outlook Web Account to Hard Drive
There is an expert solution which is opted by many users to save Outlook Web App emails. Office 365 backup Tool is the preferred choice of most of the users because of its simple to use interface and wide range of features. This application provides users with an option to save their messages in 2 file formats. There are many more features offered by this utility that are mentioned below:
- Two File Formats to Save Emails from Outlook Web App to Hard Drive
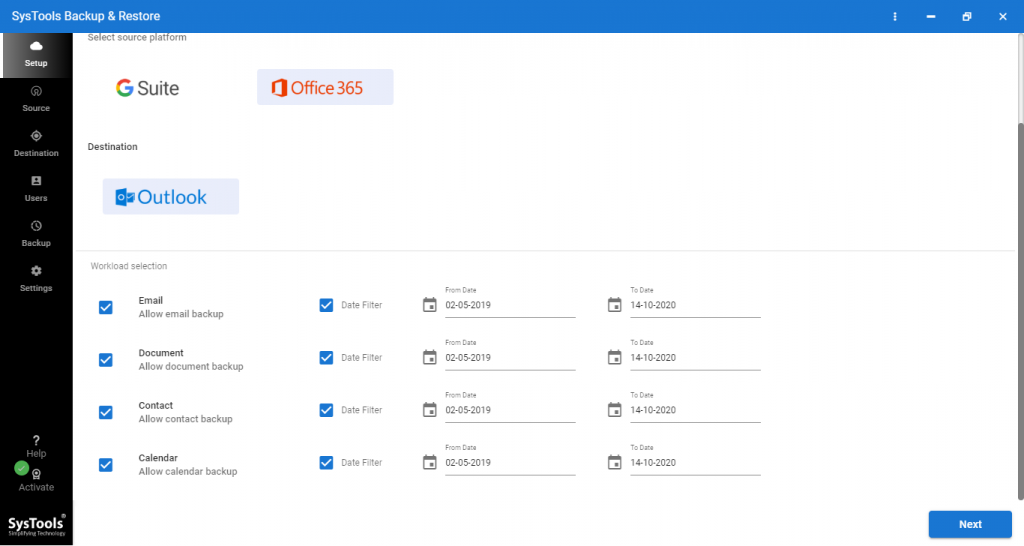
- Date-Filter to Export Data from a Specified Time Period
- Category Filter to Save All Mailbox Items or Not
- Single Utility to Import PST File into Office 365 Cloud as Well
- Free Download Demo Version to Try All Features
Download Now Purchase Now
How to Save Emails from Outlook Web App to Computer / Desktop
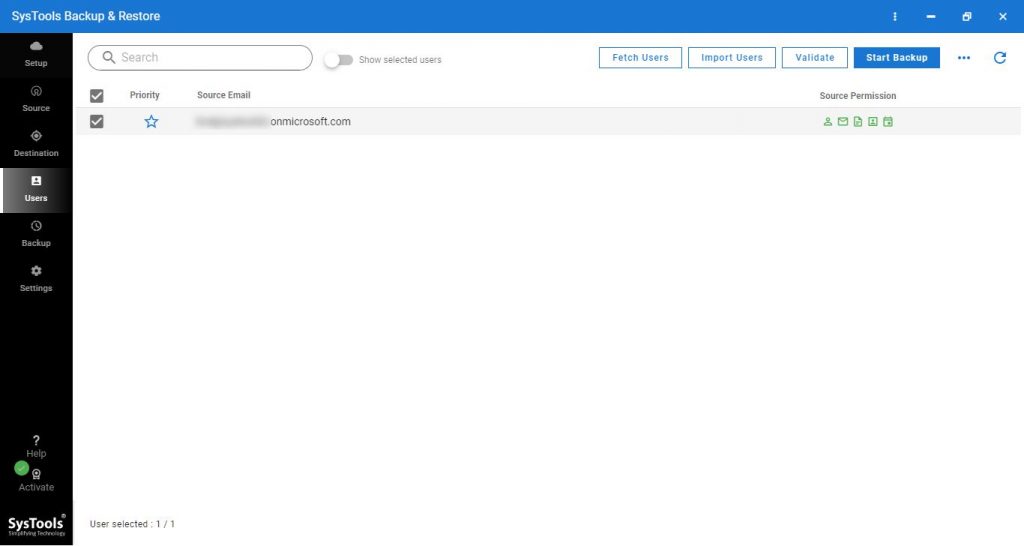
Step 1: Download tool on your computer. After installing launch the tool and opt Office 365 and Outlook as the source and the detonation backup platform.
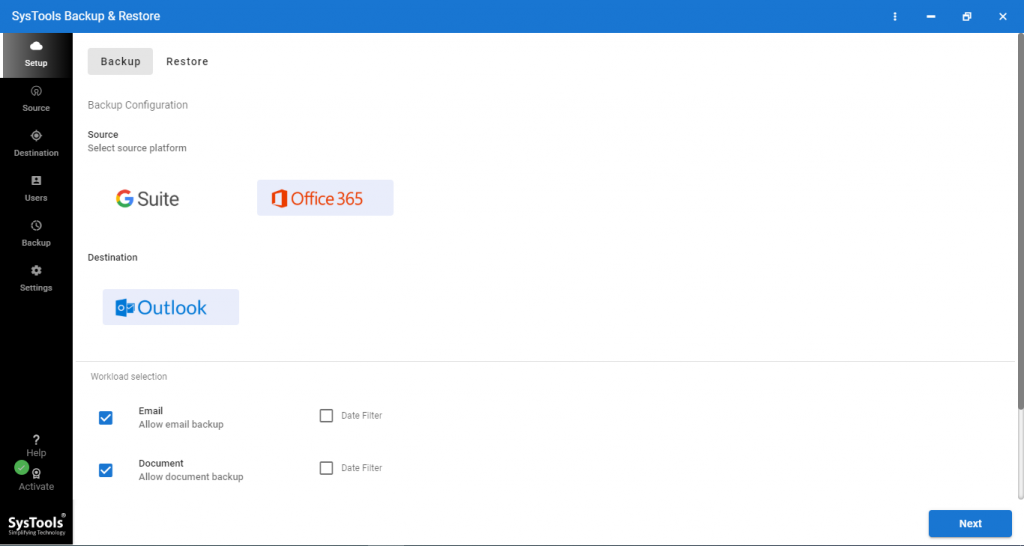
Step 2: Check all the desired mailbox category such as email, contact, calendar, and documents for backup from workload selection.
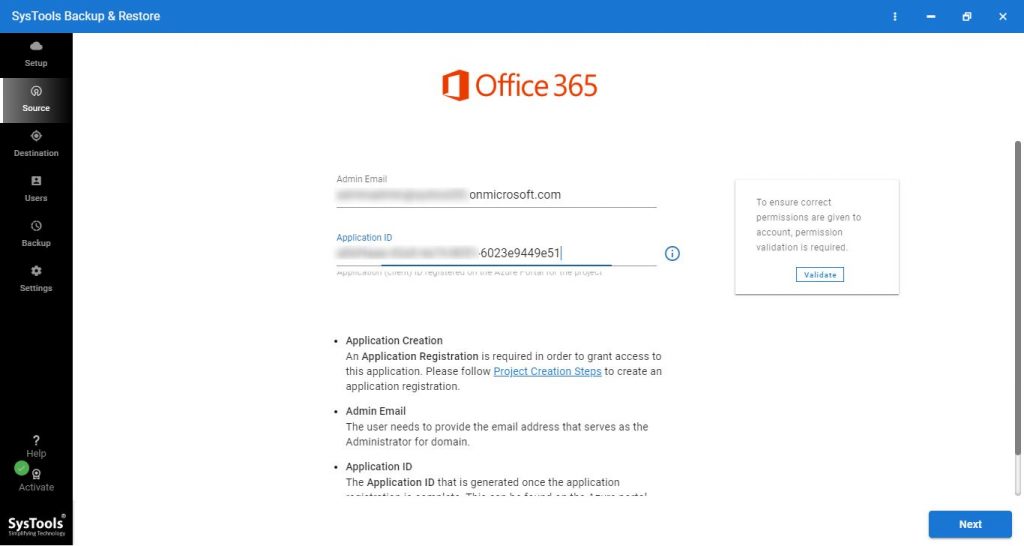
Step 3: Login using Office 365 admin account details like admin ID and application ID and click on the validate button for permission validation.
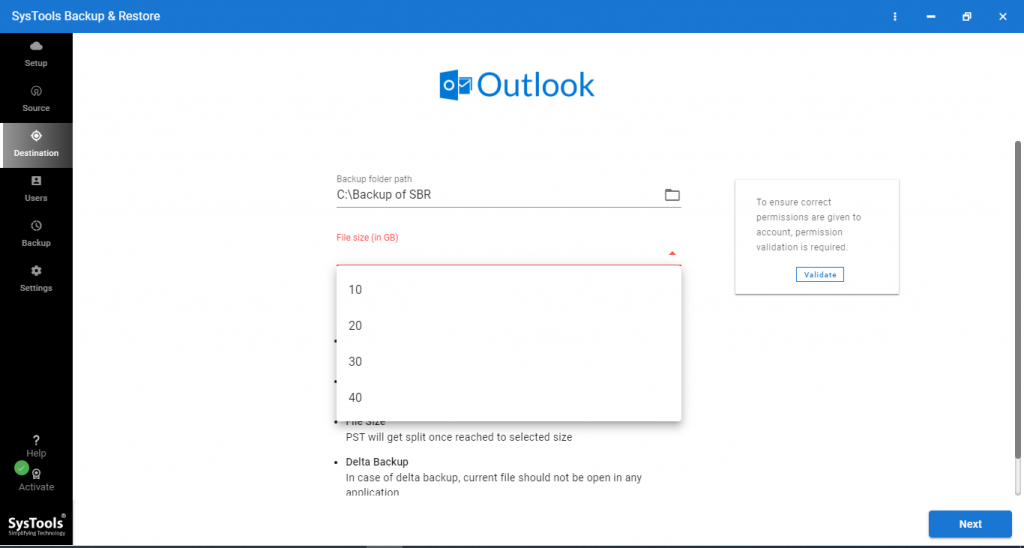
Step 4: Define the destination path and location on your local computer in order to archive the resultant PST file.
Step 5: Choose the desired Office 365 user mailbox and hit the start backup button.
2. Manual Method to Export Emails From Outlook Web App to Desktop
Follow the steps below to save emails from Outlook Web App to hard drive:
- Download and launch Microsoft Outlook application
- Now, click on the File menu and select the Add Account option
- Select Manual Setup/ Additional Server Types. Click Next
- Highlight the desired services and hit the Next button
- Choose IMAP or POP
- Next, in the user information section, fill all the essential details
- Click More Settings
- Doing this will prompt the Internet Email Settings wizard
- Here, select the Outgoing Server option and then My Outgoing Server (SMTP) requires authentication. Click Advanced and fill the necessary information
- After this, leave a copy of the emails on the server or remove it from the server after 14 days. Click OK >> Next.
Note– If you are getting any error while configuring the emails then, follow the steps mentioned below:
- Well, the errors mostly occur if the POP configuration is not enabled from the Outlook Web App account, to enable it:
- Sign in to OWA and in the navigation bar select Outlook/ Mail. Or, click on App Launcher >> Outlook
- Now, on the navigation bar click Settings >> Options
- Under the Options, choose Account >> My account
- Choose the POP option and enable it. Close OWA and reopen Microsoft Outlook
- Hit the Next button and close the window
- Eventually, click Finish to end up the configuration procedure
- Doing this will download all your emails from Outlook Web App server to PST file format and save this PST in the local hard drive.
- Now, you can access the emails stored in PST file anytime without any dependency of internet connection.
Final Words
How to save emails from Outlook Web App to hard drive is one of the most common queries asked by several computer users. This article includes two different techniques to get out of this trouble easily. Now, users can prefer any solution as per their preferences and current requirements.
How To Export Folders From Outlook Web App
Source: https://www.revove.com/blog/tips-to-save-emails-from-outlook-web-app-to-hard-drive/
Posted by: alvaresbeelty.blogspot.com
0 Response to "How To Export Folders From Outlook Web App"
Post a Comment